intro
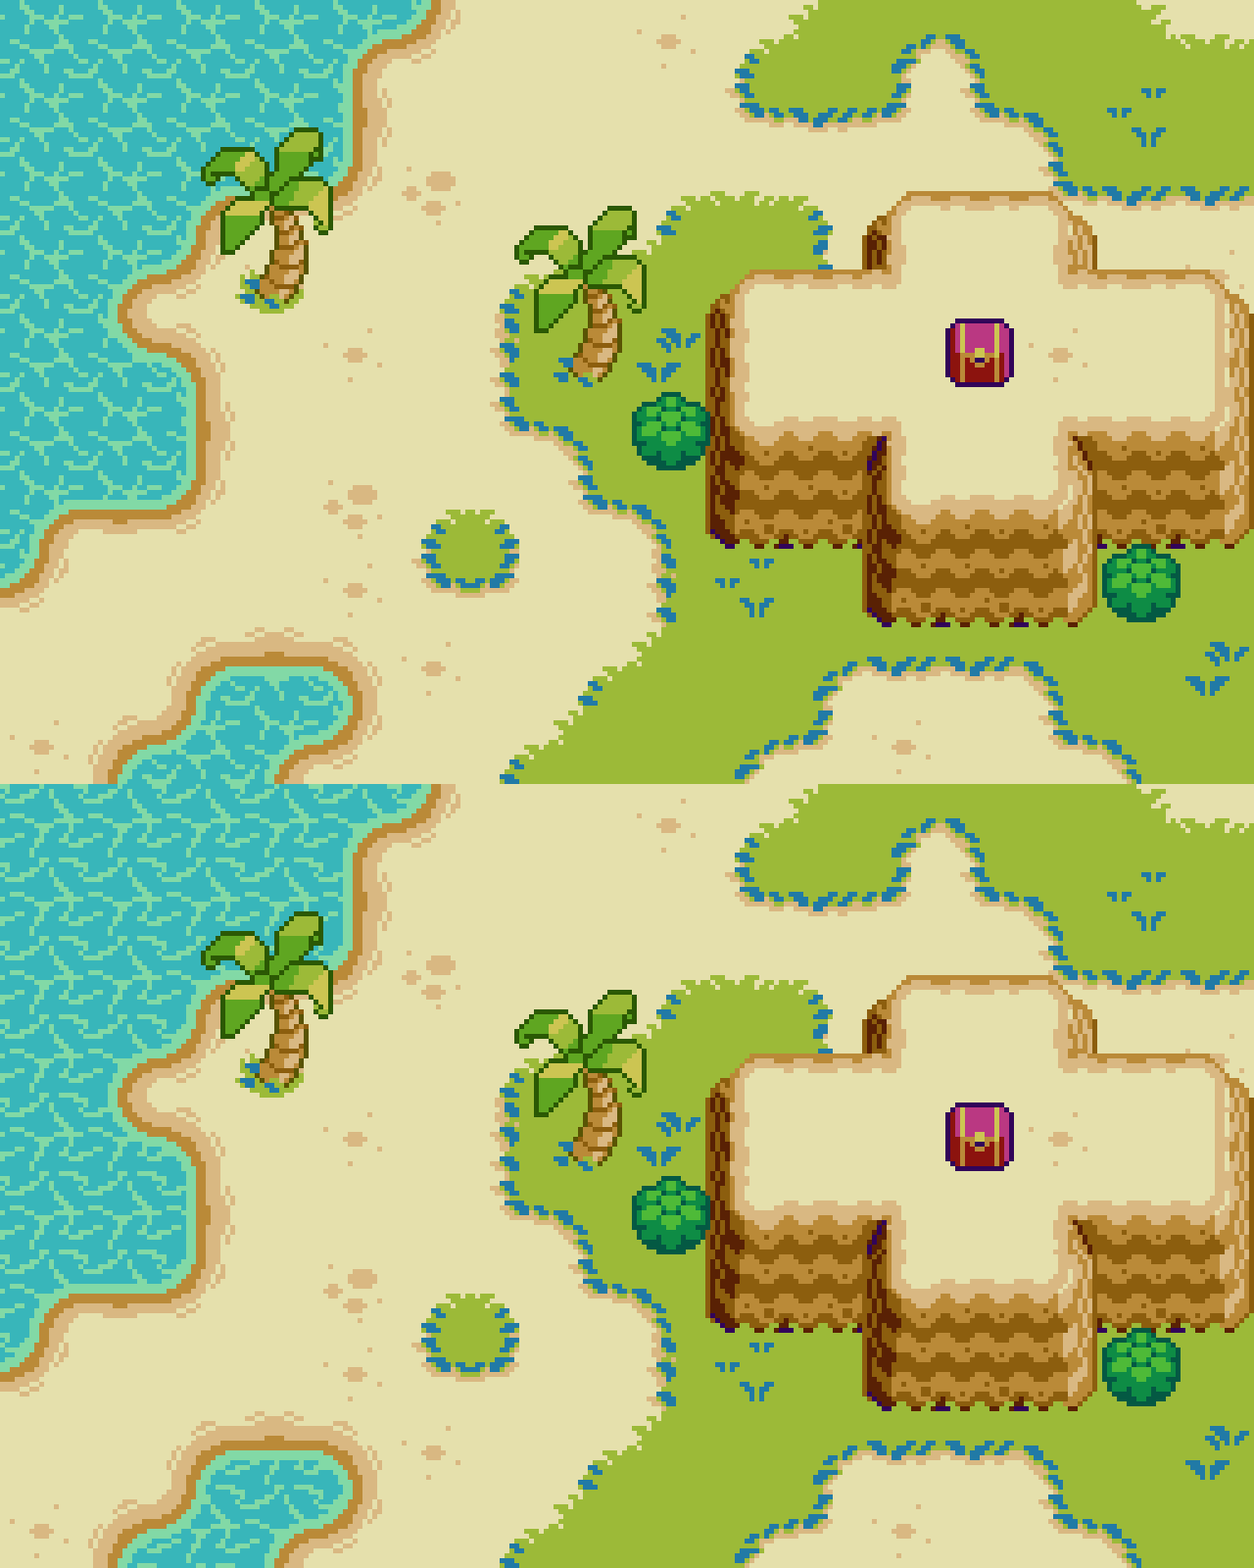
Once upon a time, bits where all the fuss when measuring the prowess of your favorite console. Most didn’t understand how it worked, we just knew more was better, as we happily moved on from 8-bit computers to greener blast processed pastures. However, I soon realized the mighty bit doesn’t equate to better games without good art. Turns out, the most beautiful expression comes in limited forms, namely pixel art. Moreover, as computer processing continues to advance, the term ‘8-bit’ remains relevant in modern discussion. In today’s context, ‘8-bit’ is generally used to refer to low-res pixel art and chiptune music that captures the aesthetic of the 8-bit era. A time which was dominated and defined by the NES. Carrying this modern sense of the term, I present a top-down world inspired by the technical restrictions of the NES, but not 100% restricted to. Including characters, animations, and environment design, the following lessons are the making for a great 8-bit adventure!
All the colors used in this feature are derived from my original palette, Bright Future.
Player Sprites
A natural place to start our adventure is with the hero, or at least one of them.
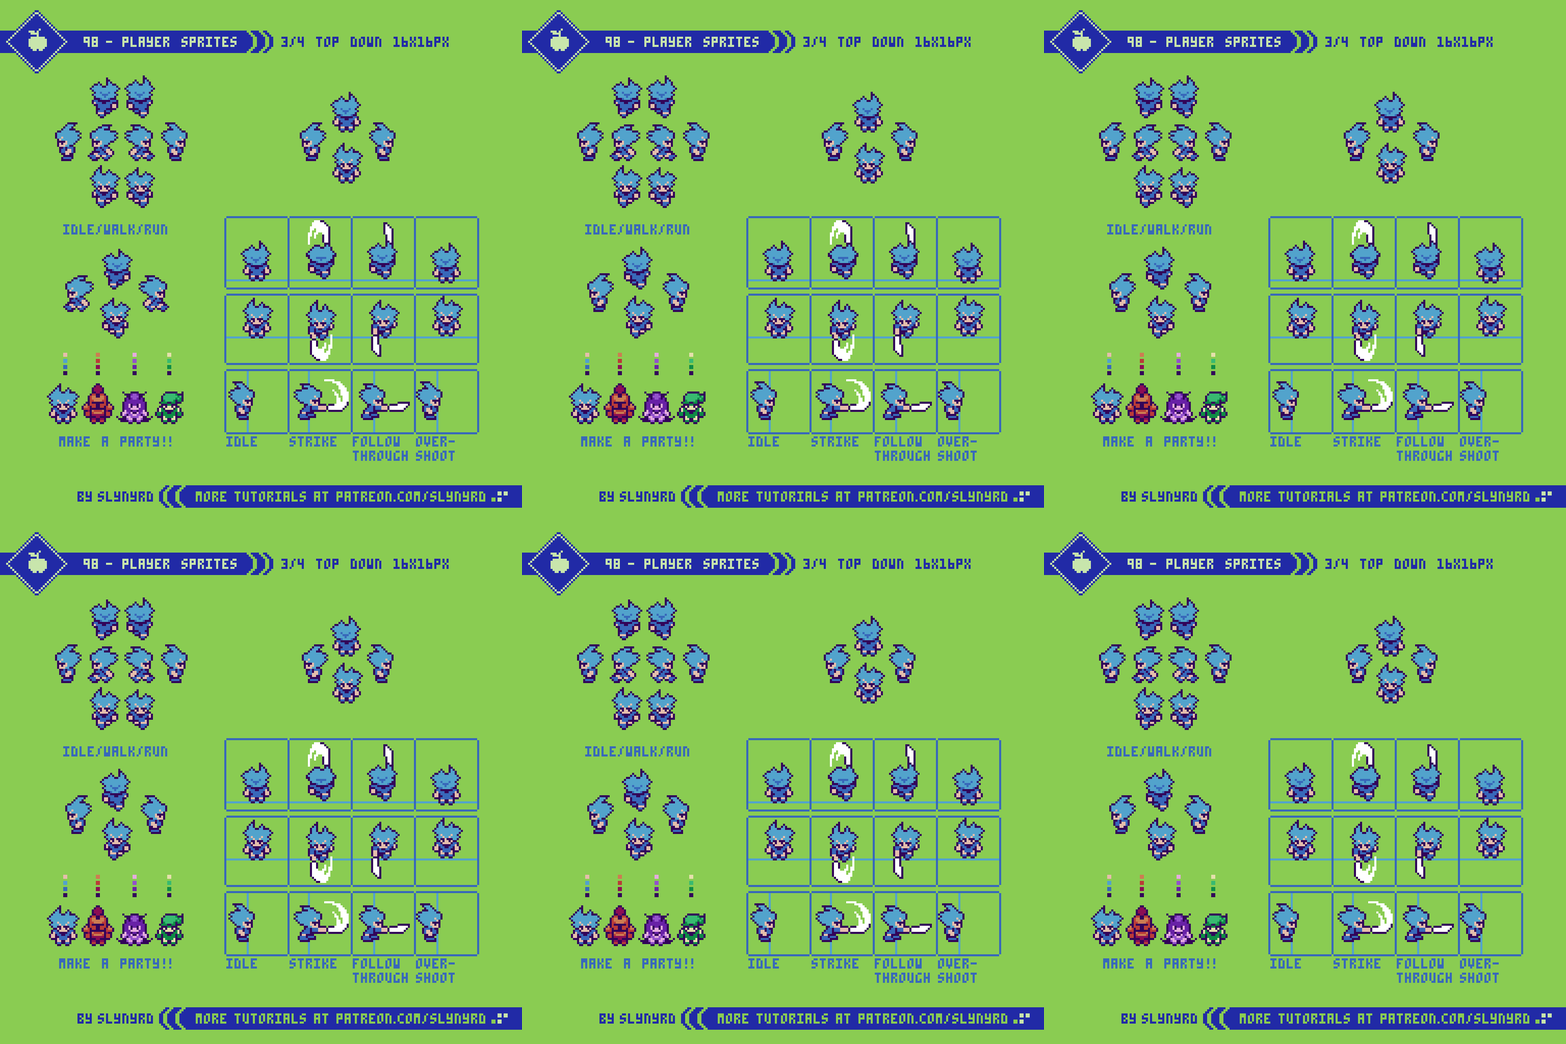
To keep a consistent retro look I used the general size of 16x16px, and limited the palette to 3 colors in addition to the outline per character. I chose this size to mesh well with environments made out of 16x16px tiles, which was very common for games of the era. I referenced a handful of games including Zelda and Pokemon, but drew the most influence from Final Fantasy 1 for the design. If you like this sprite style, I definitely recommend you study the FF1 sprites.
When it comes to the animation, I limited the frames as much as possible to capture a retro look, while remaining effective and satisfying. Surprisingly, you only need two frames to capture most actions, and it looks pretty darn good if you get the poses just right.
The timing of frames and delay between strikes is up to how you want the gameplay to flow. In this example, strike, follow through, and overshoot frames play at 0.08 seconds, with a 0.32 second delay on the Idle frame before it’s possible to attack again.
The idle and walk/run animations all use the same 2 frames, but with different timing. While the idle animation of marching in place can seem a bit silly, it adds life to stationary characters in a non distracting way, and the economy of the design is truly clever.
Enemy Sprites
If you wanna collect those sweet experience points you gotta have some baddies to slay!
SLIME
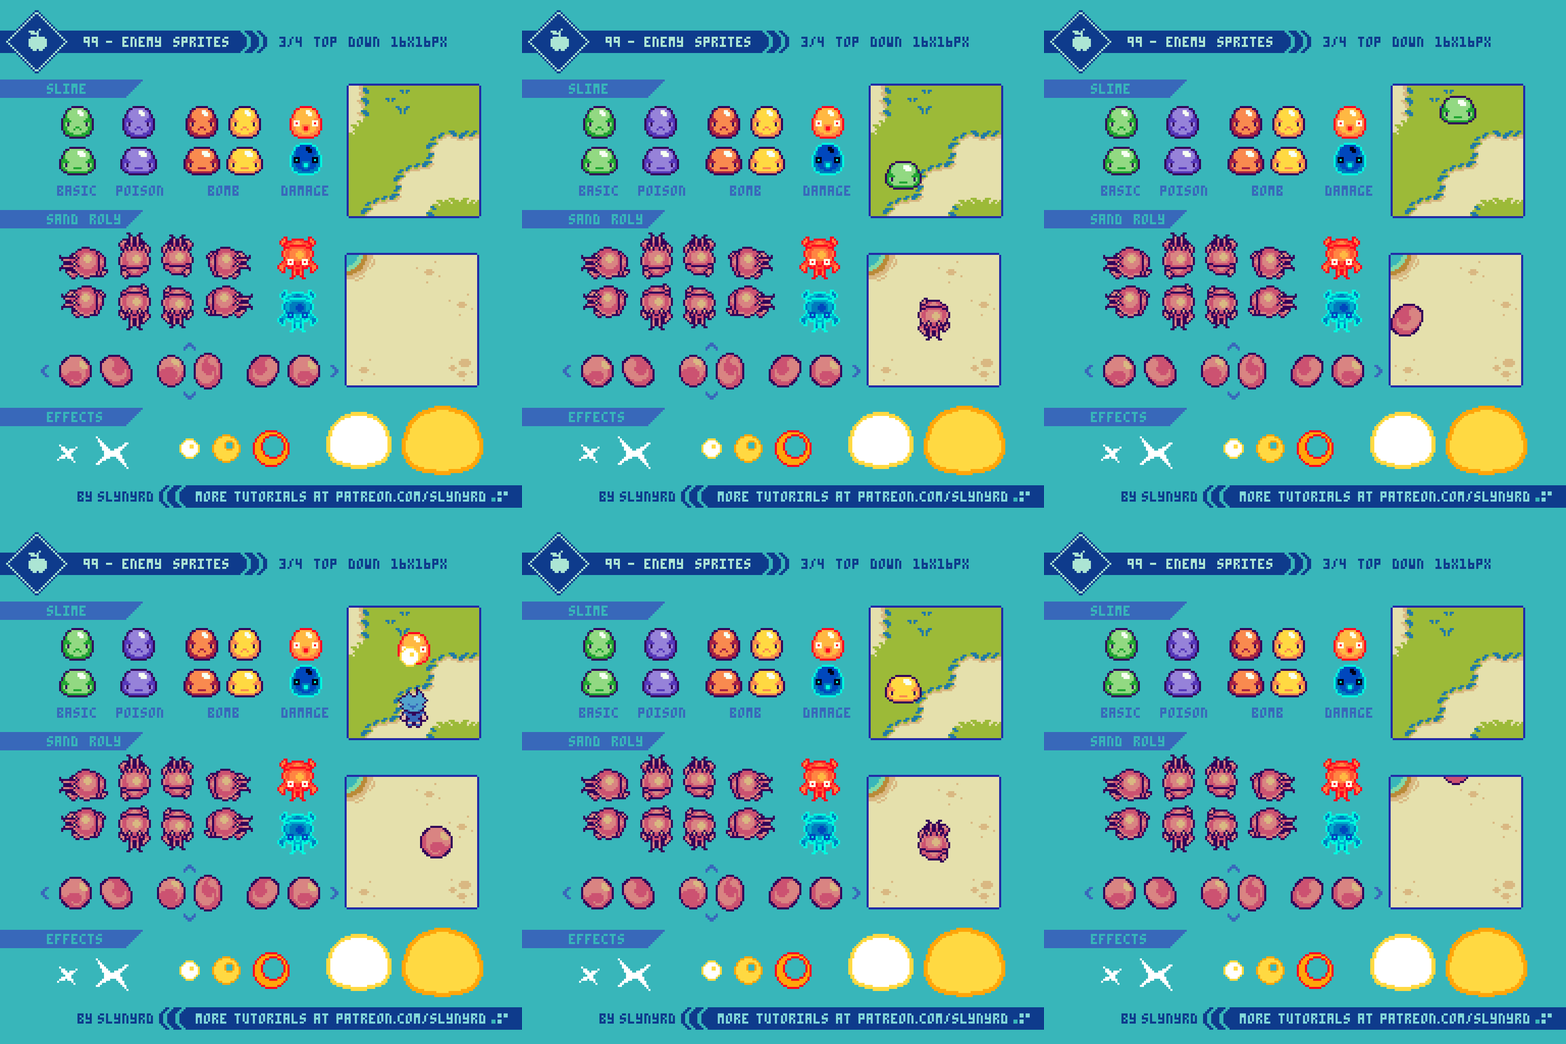
Ever since the first Dragon Quest, slimes have become a trope in a many RPG and adventure games. However, I get the sense the prominence of slime enemies has little to do with a love for sticky blobs, and is much more about their objective simplicity. Anyone can draw a blob, and the damn thing will be charming. From the top down projection, you only need the down facing orientation and movement works in all directions! In order to bring a little more interest and get even more milage from your slime designs, experiment with different colors and behaviors. Color swapping the same sprite is an easy trick to get more enemy variations with little resources.
SAND ROLY
Familiar designs like slimes are a fun place to start, but you should focus more on original designs that mesh with theme. As an example, I have created the sand roly. The first thing I consider when designing a creature is that it fits the environment, which in this case is a sandy beach. Furthermore, one need only look at the wonders of nature to find inspiration for creature design. Monster design is often a matter of exaggerating and combining real life creatures into new fantastic life. In the case of sand roly, the anatomy is inspired by mole crabs, and the balling trick comes from roly polys. The color is mostly a cosmetic choice that contrasts nicely on the sand background, but it also seemed appropriate it be seared pink out in the sun. Next time you visit the beach, beware of sand rolies!
EFFECTS
As for the special effects, a little goes a long way. In my example, there are two hit frames that momentarily flash when the enemy receives damage. First, I create the damage pose with the bugged out eyes, flailing limbs, etc. Then, I convert the colors to red hues by adjusting the channel mixer and color balance settings (Photoshop). After that, I make an inverse color version. By flashing these two frames it ensures great readability, and gives a strong impression of pain.
The X shaped strike frames appear over the point of collision with an empty frame between them for a flash effect, indicating a successful strike.
The 3 frame circular explosion is what I call vaporize effects, which can be used to show the destruction of enemies. Simply flash away the enemy into oblivion while the vaporize effect plays over it. To sufficiently cover the enemy, spread out the placement and repeat the effects for longer, larger explosions.
The large two frame explosion is intended to harm the player if too close. Alternate frames at high speed for desired duration of effect. Simple as sin, but it works so long as the animation doesn’t hang on screen too long.
Seaside Environment
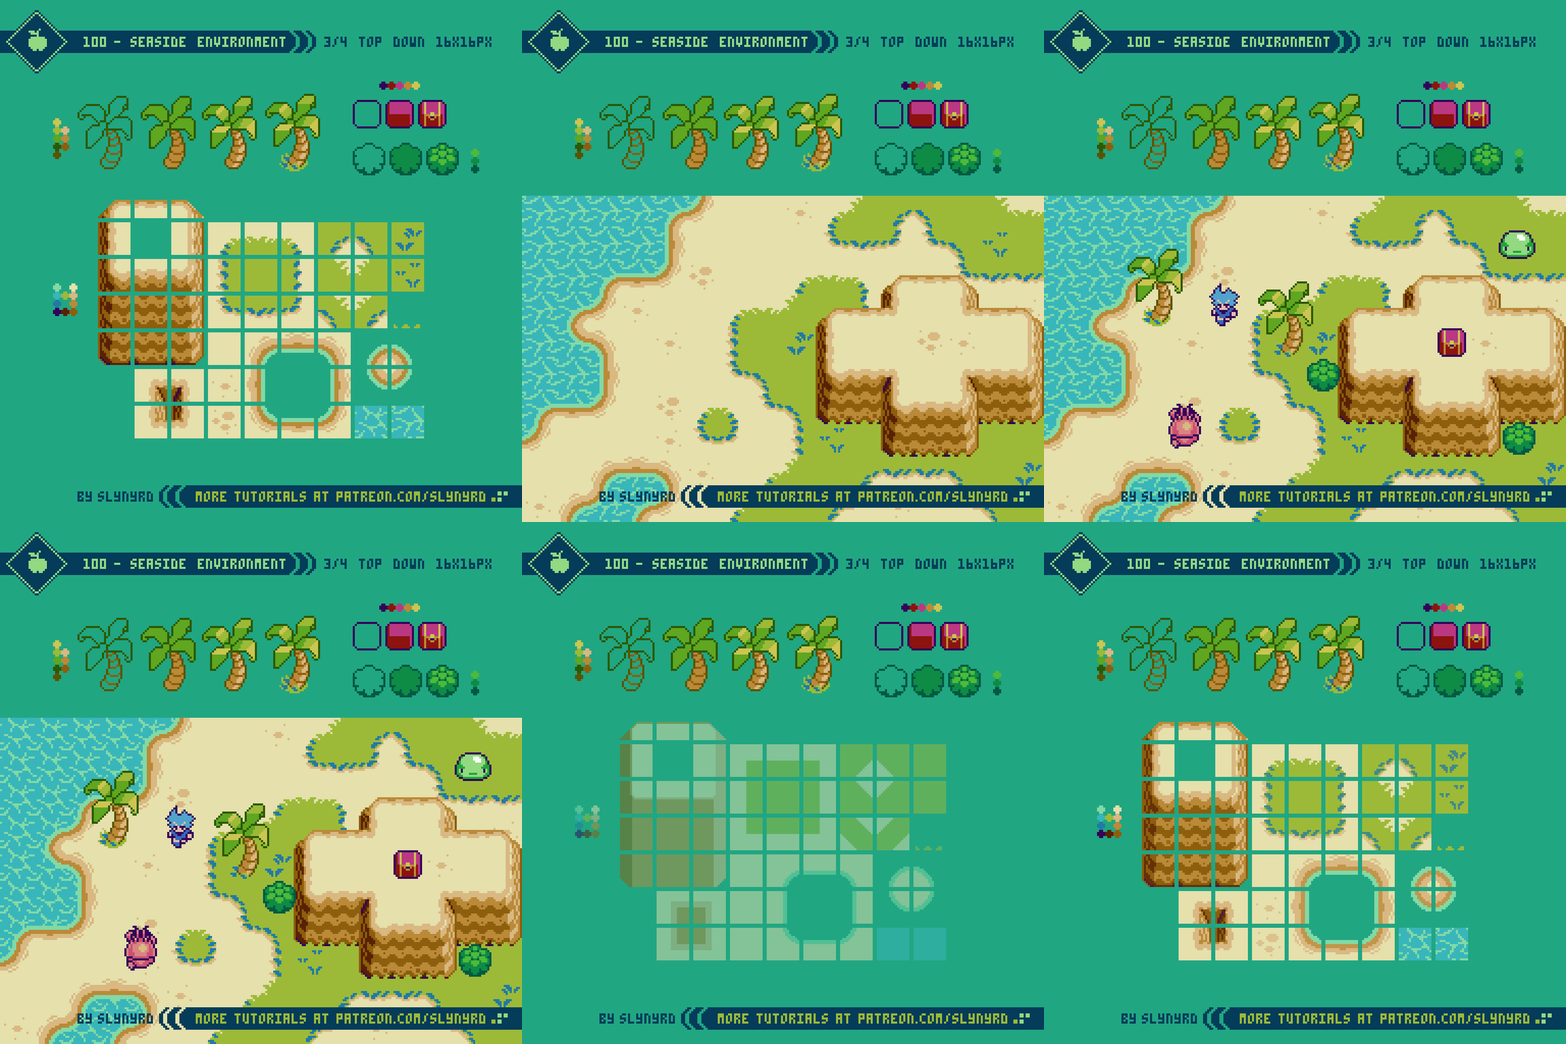
Bright green grass and soft sand beaches surrounded by calm blue water… What better place to grind away on the easy fodder?
I approached the design of this environment as if it’s the first stage, or starting area of the game. Generally, games start in a welcoming environment with very passive enemies. This creates a relaxing atmosphere where you can come to grips with the game before venturing to more treacherous terrain. I certainly appreciate this approach, and again want to emphasize the importance of theme. Mesh the enemies and mechanics with the environment, so each area stands out, and the introduction of each new enemy is memorable.
Again, I’m drawing inspiration from 8-bit iterations of Zelda, Pokemon, and Final Fantasy for parts of the tile design. As for tips on making beautiful top down tiles, please review Pixelblog 20 for the fundamentals.
Final Thoughts
With technology today, you can use countless colors, make huge sprites, and include as many frames of animation as you like. While I appreciate the artisanship in hard labor, and the spectacles brought by advancements in computing, the old school graphics just keep looking better and better. So, why overcomplicate things? Seriously though, I would love to be making this game for real. Maybe someday… or, you could make it for me, Haha! Join my Patreon and download all the assets to use for yourself!
RESOURCES
Please consider supporting my work by becoming a Patron. Among many other rewards, Patrons can access resources to compliment my tutorials. But most importantly, you allow me to continue making new content!
Alternatively, you can support me by making a one-time donation directly on my homepage, and receive exclusive art and resources.
Assets featured in this Pixelblog are available in 8-bit Adventure Asset Pack
Source files used in the making of this PIxelblog are available in 8-bit Adventure Source Files
Download the palette used to create this tutorial, Bright Future.
Get caught up on all my downloads
You made it to the end of the article. Thank you for reading!
-By Raymond Schlitter


