Intro
Parallax scrolling is a technique used with 2D art where background images move slower than foreground images to capture a sense of depth. Just by applying motion, a scene can immerse you in an endless landscape and tell grand stories. In this lesson I will focus on how to make stand alone parallax animation loops with pixel perfect motion. Furthermore, I will detail my personal technique using Photoshop, which can also be translated into various pixel art apps that allow animation.

The first thing to consider is the scene you want to animate. Parallax scrolling is well suited for layered scenes that exhibit atmospheric perspective, such as landscape scenery. Parallax will enhance the sense of depth but it may not be convincing if your scene doesn’t already convey depth when static. For more about making landscape scenes with atmospheric perspective, check out Pixelblog 11.

Of course, clouds are always a great subject to parallax. I recommend starting with something simple, like clouds or stars to practice on the execution of the animation before attempting complex scenery. Since you need very long or tall images to run across the canvas, it’s best to make images that can loop at the seams of the canvas, and repeat them. The drawback is some layers can look monotonous when repeated many times in the loop. Balanced layers without dominant points of interest help hide the loop.
Pixel Perfect Movement
Pixel perfect movement is movement that only moves in increments of pixel units. Pixel art is created at 1x resolution (one pixel unit equals one pixel on screen) and usually animated on the same scale. It’s possible to upscale pixel art assets and give them smooth sub-pixel movement in a game engine or animation software, but fundamentally speaking, you can’t move a half pixel.
With movement being strictly tied to whole pixel increments, the pixel dimensions of the canvas become critical. For movement to be smooth and steady the scroll rate should be the same amount of pixels each frame. To do so, the pixels moved per frame must divide into the dimension of the canvas the motion runs along, so choose an even value that divides into many whole numbers.
The canvas in my example is 96 pixels wide, which can divide by 1,2,3,4,6,8,12,16,24,32,48. This is a good size as it gives a lot of options for perfect scroll rates, and you can see the jumps between the increments follows a consistent upward curve, which will result in natural jumps in speed between layers.
Before you get too far along it’s good to test out the motion of your layers to make sure the relative speed feels appropriate for the perceived depth of the image. Generally, I start with my furthest background layer scrolling at 1 pixel per frame, and each layer that gets closer to the viewer scrolls at the next faster perfect rate. Sometimes when I want movement slower than 1 pixel per frame I do 1 pixel per 2 frames, which requires the image to repeat twice on the same screen, as it only travels halfway across the canvas throughout the loop. However, I try to avoid slower than 1 pixel per frame, as the motion can look a bit jittery.
Made in Photoshop
Now I’ll take you through my process to animate parallax scenes in Photoshop, using the frame animation tools. Frame animation in Photoshop is pretty bare bones, but it always gets the job done. With proper planning and organization, I’ve managed to create a number of complex animated scenes with it. There’s something deeply satisfying and almost hypnotic about creating the perfect animation loop under the limitations of frame animated pixel art.
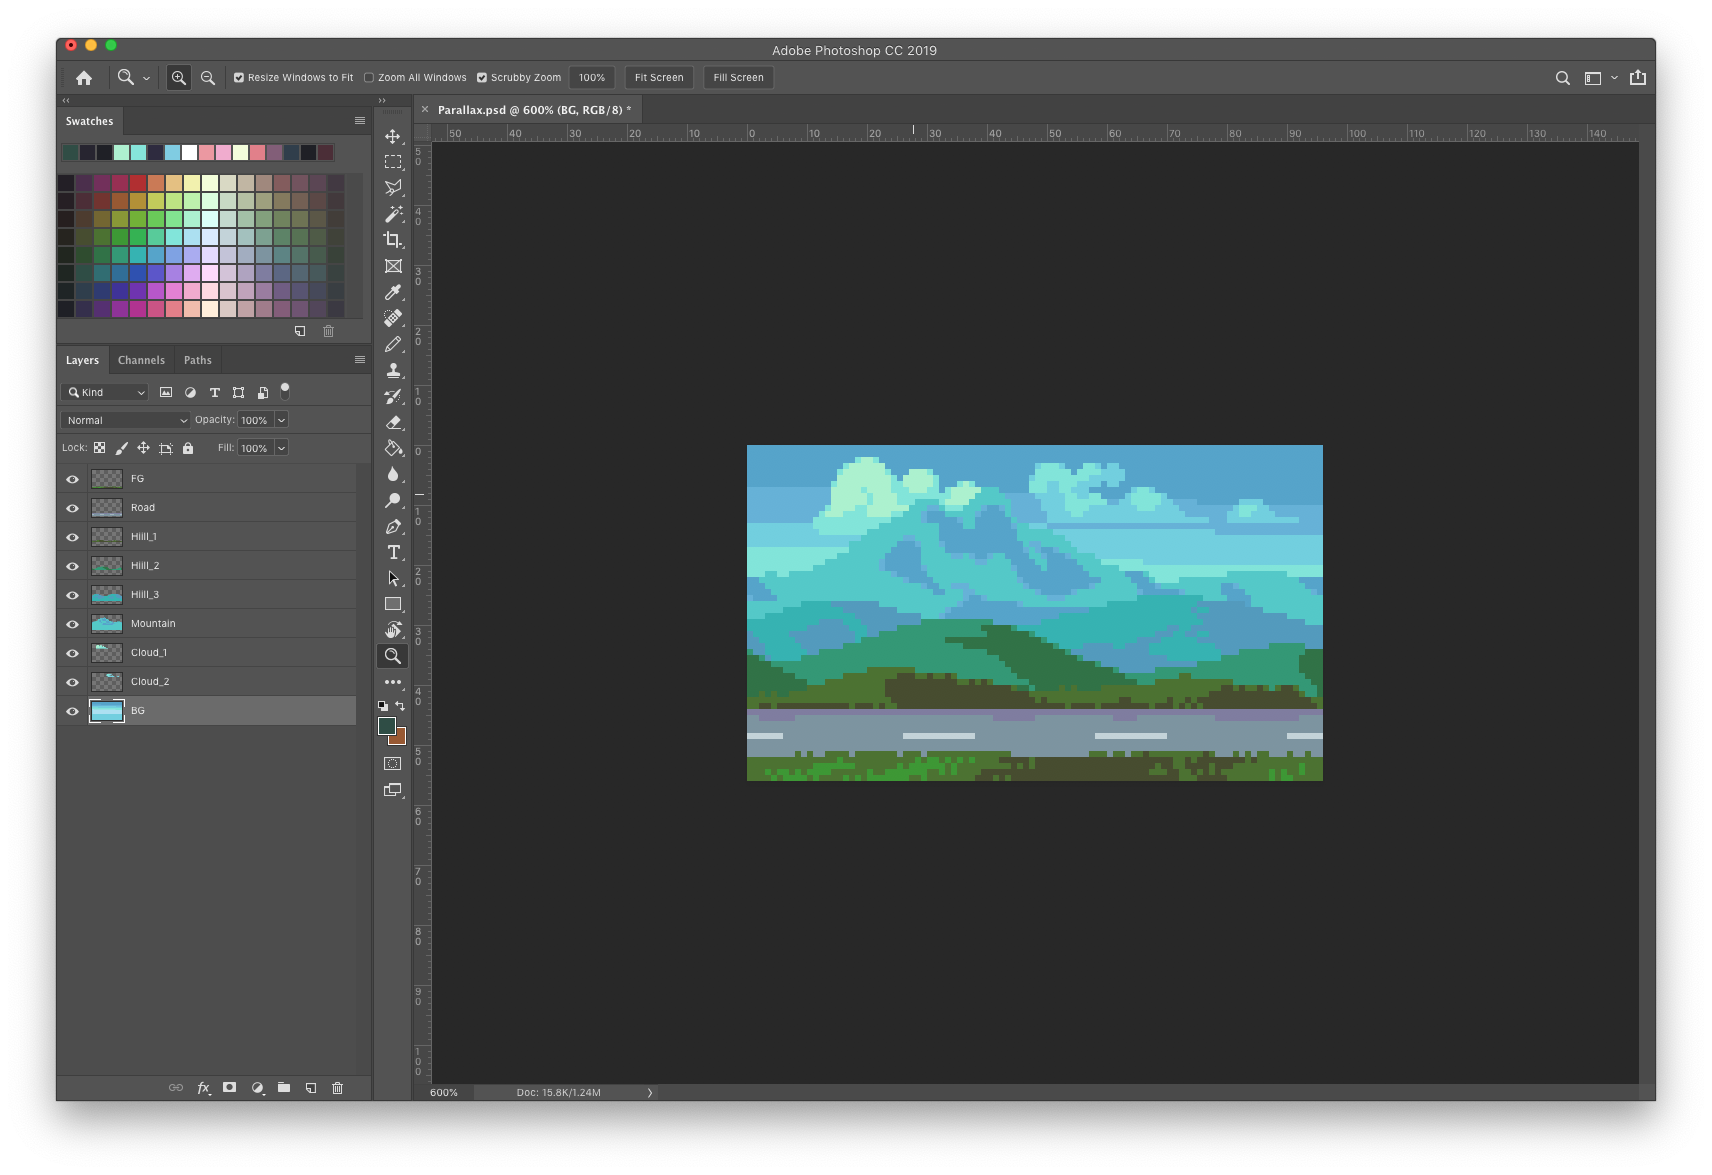
First I choose my canvas size(96x56px) and create my scene out of several layers.
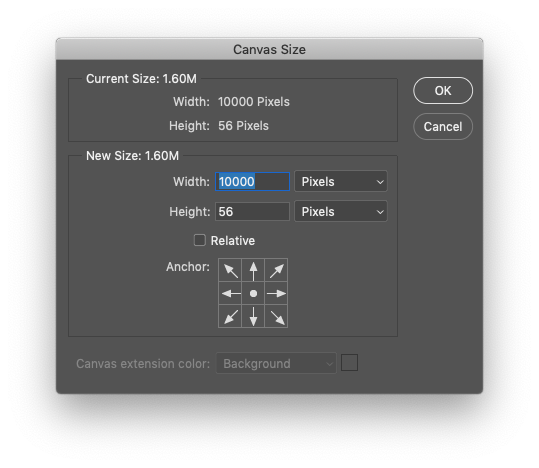
As soon as the final image size is established I like to extend the canvas width by a large even amount of pixels just to make plenty of room to work with. Image-Canvas Size (⌥⌘C). The anchor point stays centered.
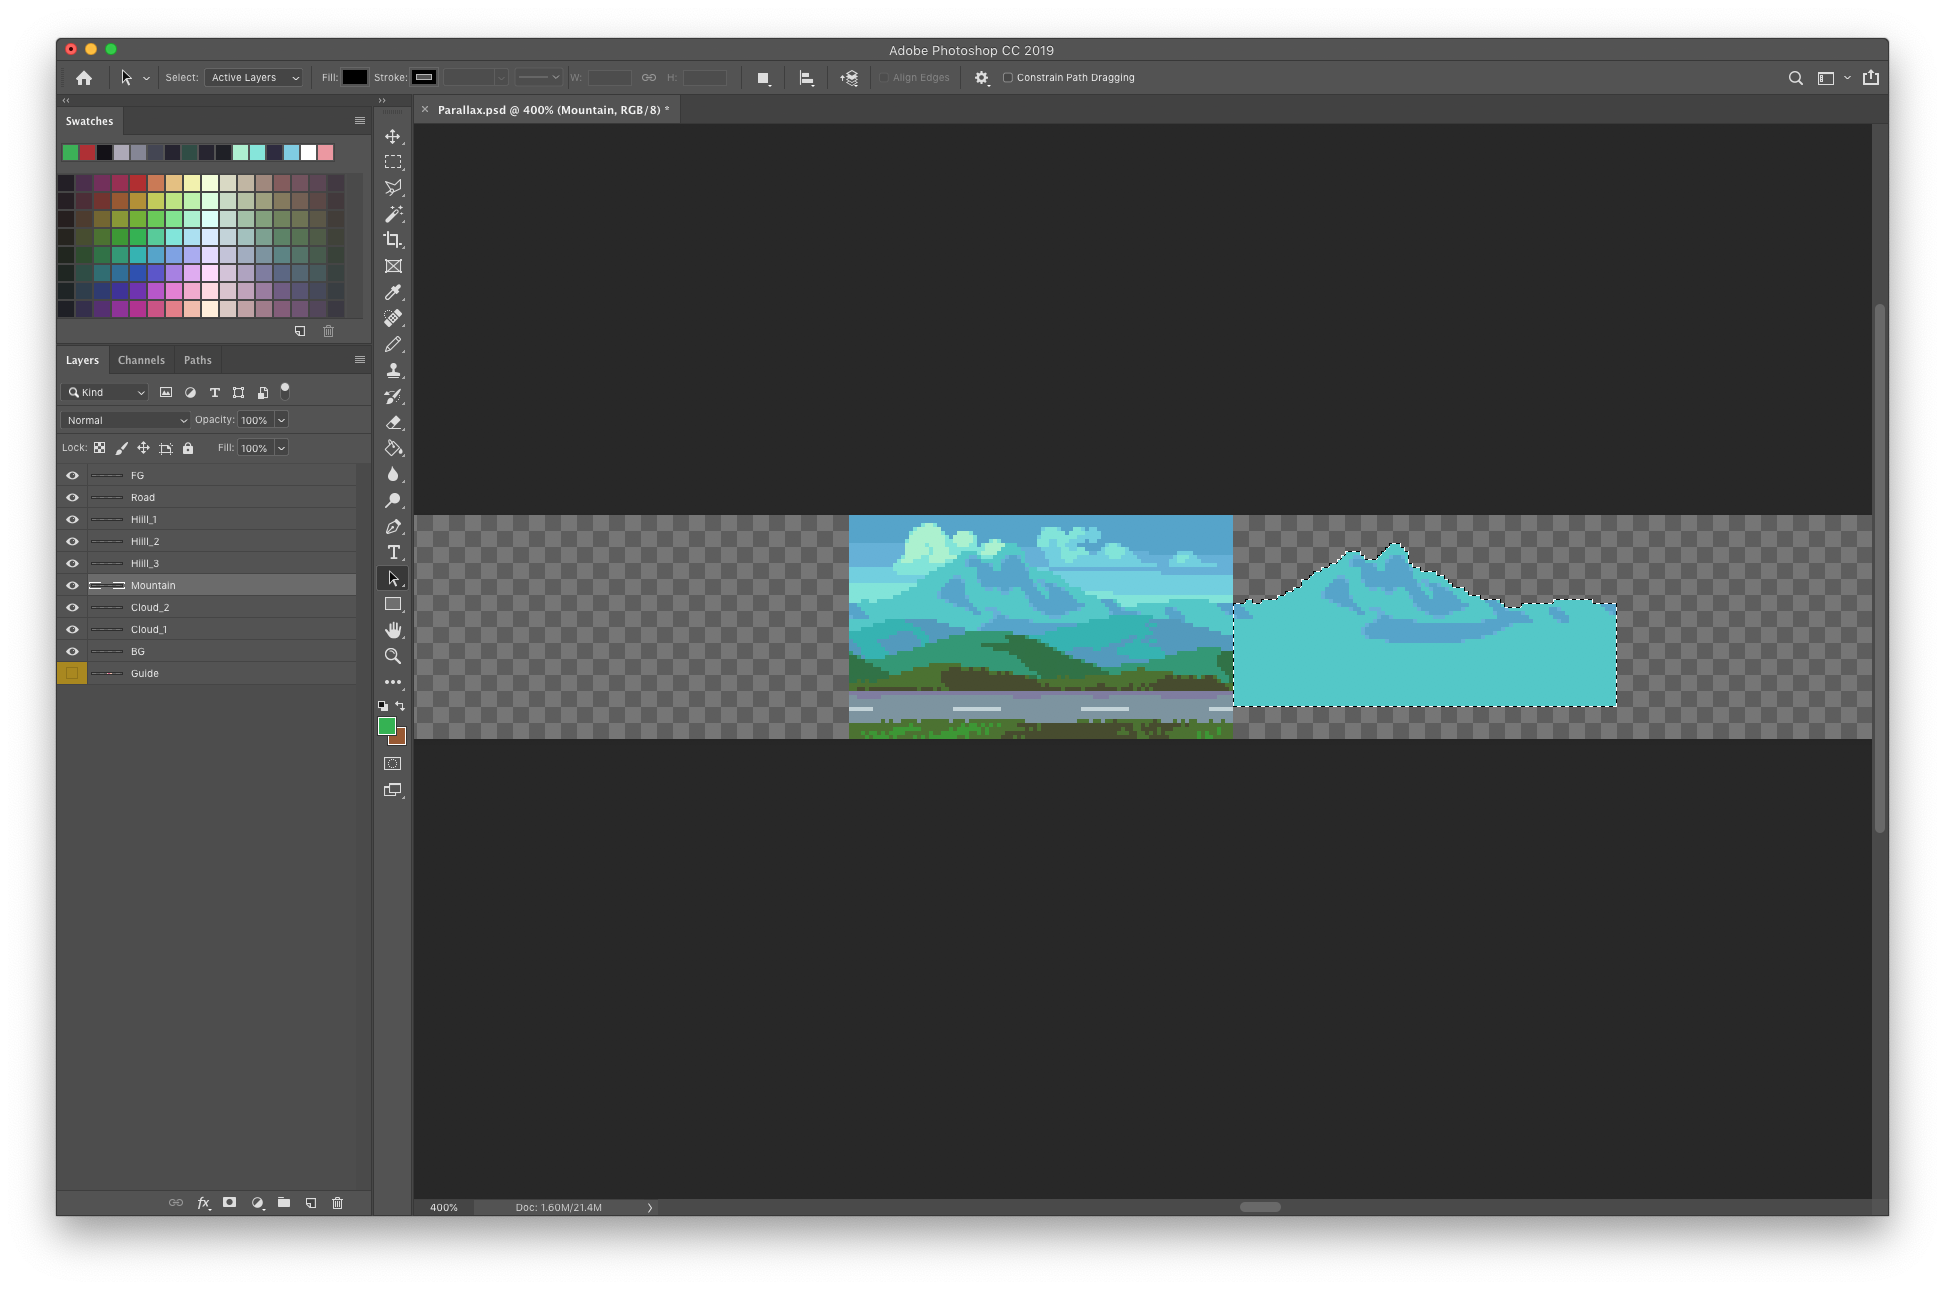
Now I can make sure my images connect and see how they look when repeated.

Once I’m satisfied with the composition I make a guide that measures screen widths on a new layer. I number the increments that divide into final image width(96px). The guide is made long enough to accommodate the fastest moving layer.

Using the guide I loop out each layer by screen widths. The number of repeat screen widths will equal to the number of pixels moved each frame when animated.

After extending all my layers I turn on the Timeline to animate (Window-Timeline). Then click in the bottom left to covert to frame animation.
I set the frame delay before I make more frames. The frame delay determines the playback speed of the animation. Clicking on Other… allows me to set a custom delay for much faster playback. I set it to 0.08s in this example.
I add one new frame in the timeline, which creates a duplicate of the previous frame.

Frame 1 still looks like this.

In frame 2, I slide each layer to the left the distance of how many repeat screen widths it has, coming all the way to the right edge of the static background. With the start and end point of my animation set I can turn off the guide layer.
Next, I select both frames and click on the Tween command.

The Tween command adds frames between two existing frames and interpolates any change in position, opacity, and layer effects. In this case, it will automate the movement of my layers between frame 1 and 2 with however many frames I specify. I want my total frame count to match the pixel width of the final canvas size of 96px. Since the centered image in frame 2 is the same image as frame 1, this layer will be trashed after I tween. Therefore, the number of frames added is the final canvas width -1. So in this case, I add 95 frames.
This results in 1 extra frame at the end, which needs to be deleted to make a seamless loop.

After I’ve tweened the motion I set my canvas size back to the final desired width of 96px. Adjusting the canvas to a smaller size masks the data that is off the screen, so I can always go back to the wide canvas and everything will still be there.

Boom. The movement of each layer is consistent in every frame, and the loop is perfect.
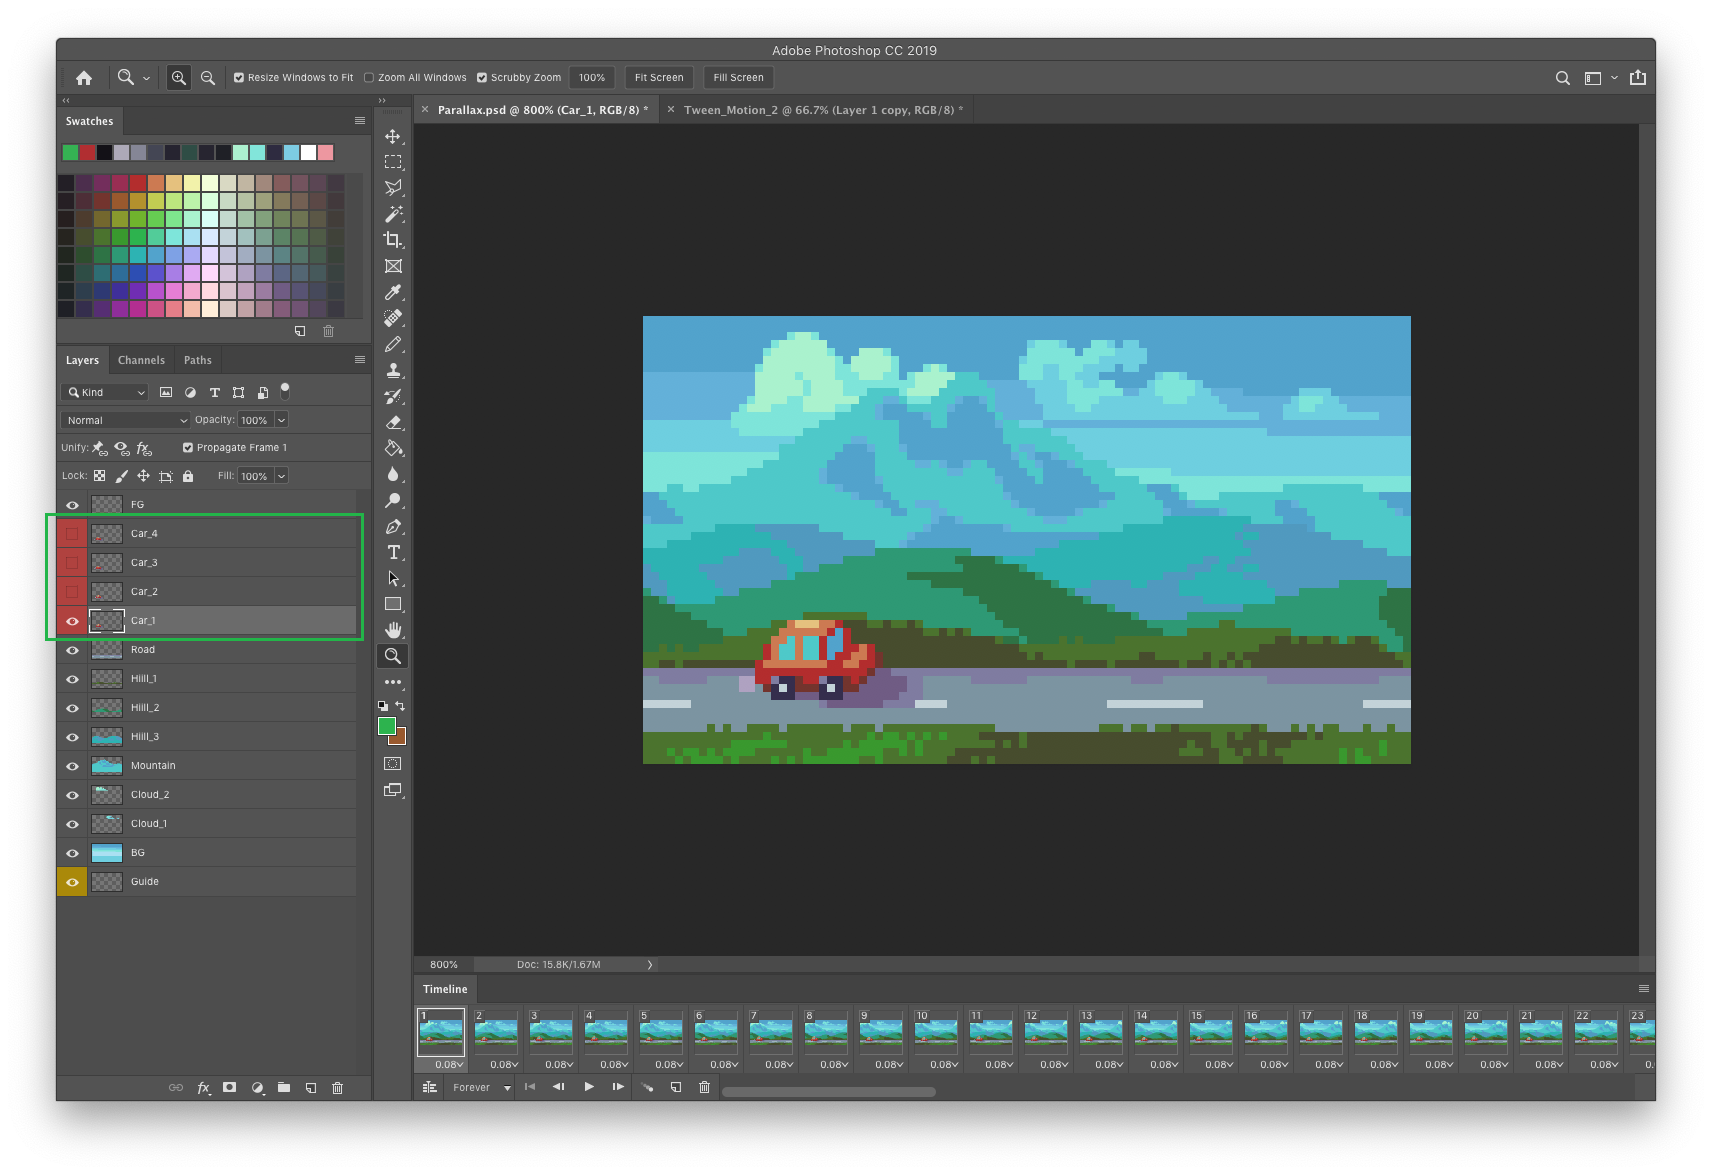
After I’ve animated my parallax background I can go back and add details, like an interesting subject that moves with the camera. In order to keep the complete animation a perfect loop, any constant looping animation that is added to the parallax must loop in a number of frames that divides into the total number of frames. In this example, I add a car that animates in a 4 frame loop. To add the car I create each state of the animation on a separate layer. I then have to go through all the frames 1 to 96, and cycle the visible layer to animate it. This step can be tedious if the animation has many frames, but is made much easier by assigning keyboard short cuts for Go To> Next Frame, and Go To> previous frame.

To save my animation as a gif I use Save For Web (File-Export-Save For Web ⌥⌘⇧S). This brings up a panel with several options. In the top right I set the file type to GIF in the second drop down. The settings for the selected file type is optimized by default but can be further tweaked if needed. In the bottom right I can choose the size if I want to upscale. For pixel art the size should be scaled only by multiples of 100% and the quality set to nearest neighbor. Also, I make sure the looping options is set to forever to make the gif endlessly loop.
When working in Photoshop the playback speed of the timeline can be quite laggy, which makes it hard to see what the animation actually looks like. To work around this I frequently export it as a gif and jump to it in the finder to preview it in real time speed.
Let’s go road trippin’ forever. Feel that parallax pull you in.
Key Points
Parallax scrolling is well suited for layered scenes that exhibit atmospheric perspective, such as landscape scenery
Screen width = total number of frames in loop - choose even value that divides into many whole numbers.
Make image loops on edges of the canvas so you can repeat the image to extend it
Times image repeats = pixel movement per frame (scroll rate)
Balanced layers without dominant points of interest help hide the repeating images
Any constant looping animation that is added to the parallax must loop in a number of frames that divides into the total number of frames
Animate with software that can tween the motion between the start and end point of the loop
If done correctly the scroll rate of every layer should be the same every frame, and the animation should loop seamlessly
Final Thoughts
There’s something about turning a static scene into an endless expanse that feels like magic. I started using this technique in the early days of my pixel art journey, but my proficiency and execution has greatly improved over the years. So I think even beginners can try this tutorial and learn through practice. The animation is actually a piece of cake. Making quality art with depth and balance is the main challenge of creating an attractive loop. Plan well and don’t rush the art. However, it’s good to do motion tests before spending too much time on your art, especially if you don’t have a good feel for the speed of pixel movement. Happy parallaxing my friends!
Resources
Was this article helpful? If you find value in my content please consider becoming a Patron. Among many other rewards, Patrons can download resources to compliment my tutorials. But most importantly, you allow me to continue making new content.
Assets featured in this Pixelblog are available in Parallax Scrolling Asset Pack
Source files used in the making of this Pixelblog are available in Parallax Scrolling Source Files
Get caught up on all my downloads
If you're not ready to commit to the subscription model of Patreon, make a one-time donation and receive exclusive art and resources. Help continue the content by providing me a living. Thank you!
-By Raymond Schlitter